
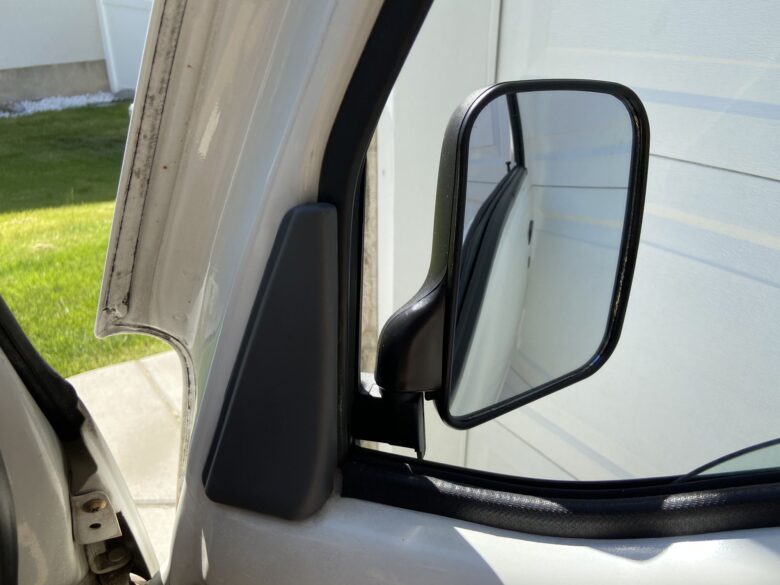
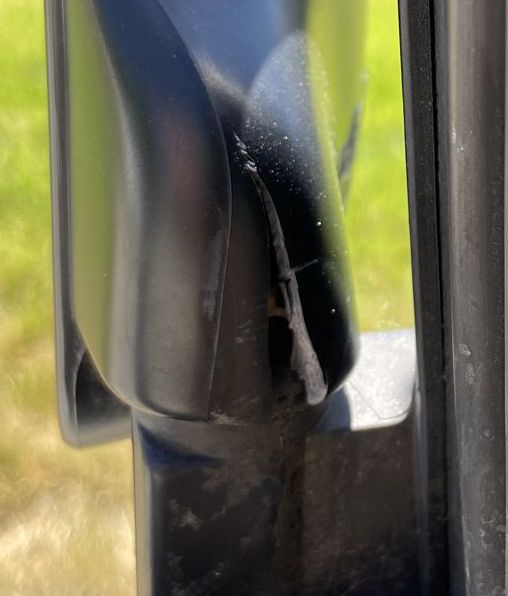
After 25 years of road use and sun, plastics start to break down. Our mini trucks are no different. The mirrors seemed to be in pretty good condition, but when looking more closely, there is a crack that has formed on the pivot. It has split to the point that it is pretty difficult to keep it in the position desired.
I found a pair, both left and right mirrors, on eBay for $99 with free shipping from Japan. It looks like they have added $15 shipping now, but it came quite quickly via FedEx, so even at that price I’m not too concerned. This is for the 90-98 KS3, KS4, Dias, KV3, and KV4. The right mirror is Subaru part number 91032TA230, and the left mirror is part number 91032TA240. It turns out the $99 mirrors are aftermarket (well duh!) but they turn out to be pretty good. Comparing them with the originals as we removed them, even the interior ribbing seems to be basically the same. Our take: this may be a case you can get away with aftermarket parts. It might even be OEM.
That said, swapping things out when you are working with interior panels can be a pain if you don’t know what the connectors look like, and where they are. Hopefully the following will be of help.
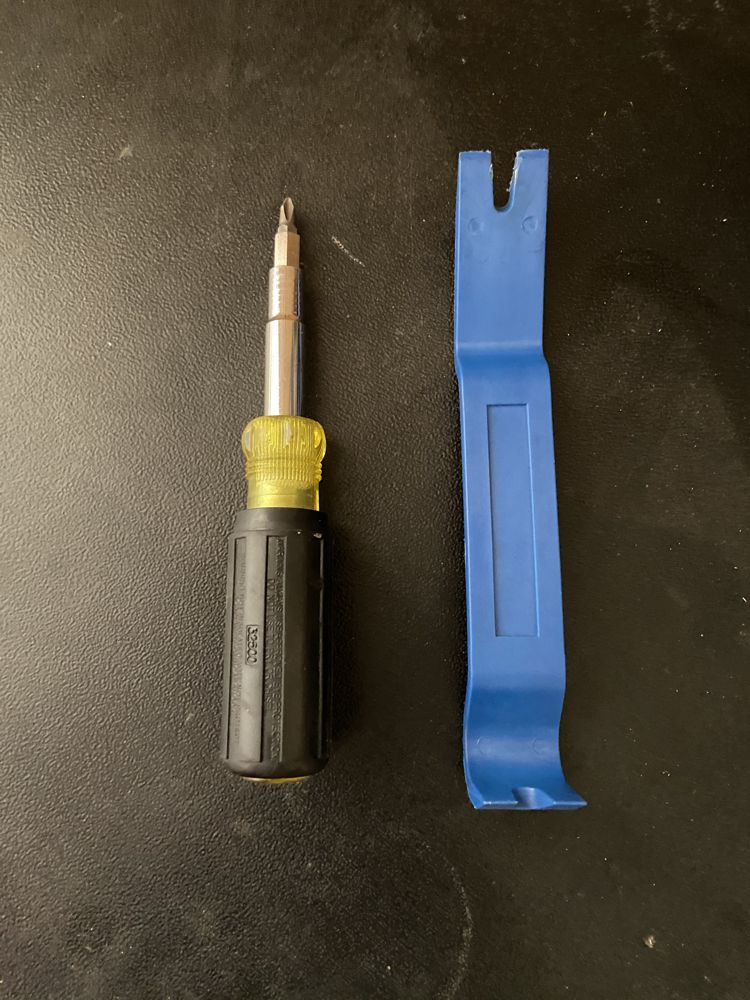
The tools you will need are pretty simple. A phillips screwdriver and a trim tool are all you need. If you don’t have a trim tool, a long, skinny screwdriver, or even just a popcicle stick should do the trick. From there a wet rag for cleaning up behind the panel would be of value too.
The first thing we would recommend is wind the window down. It sounds simple, but I didn’t until halfway through, and it makes a difference.
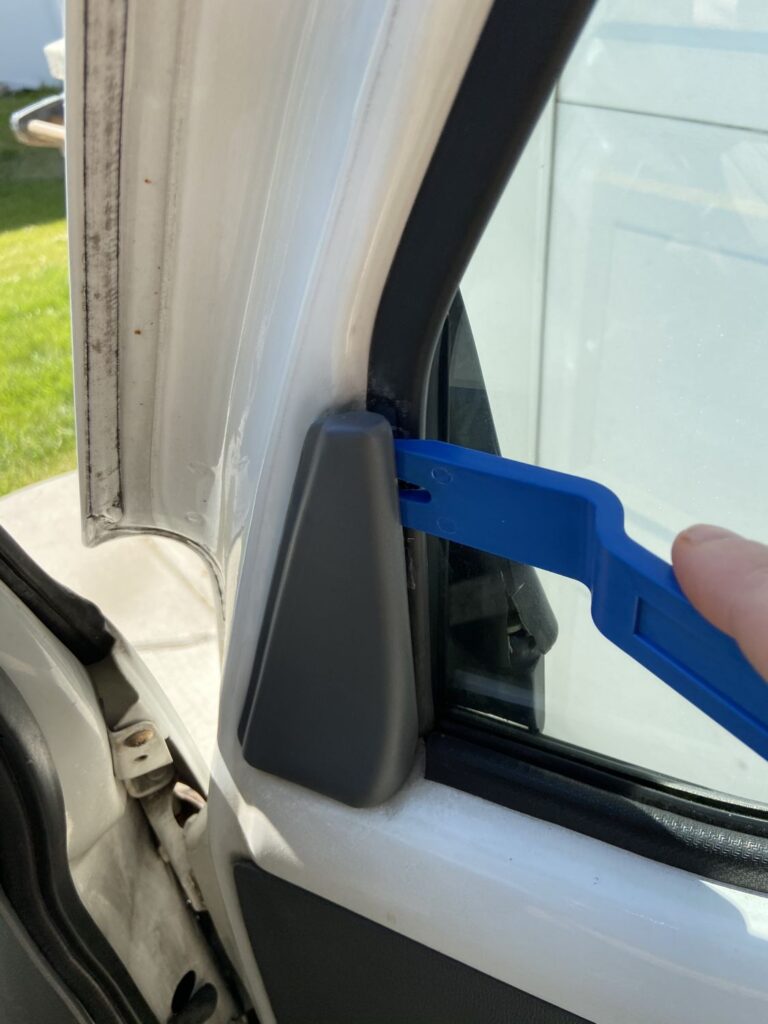
Start by inserting the trim tool in the top of the interior panel as shown here:
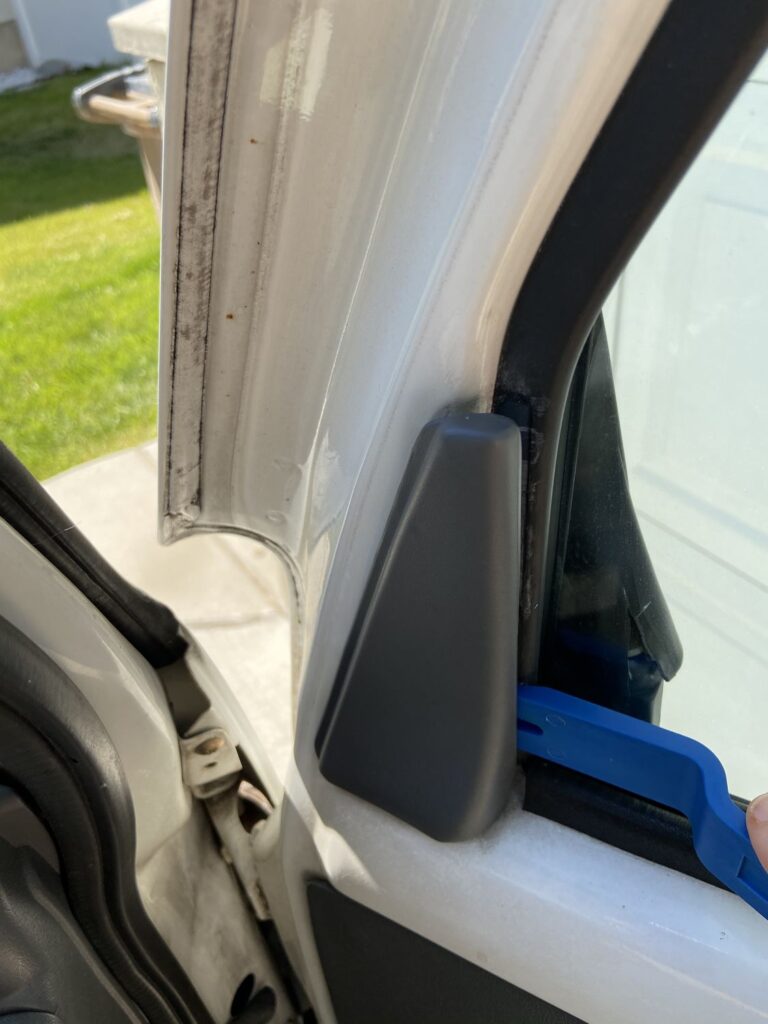
The top comes out easily. It is a ball going into a plastic bracket. Pop it out.
Next move to the bottom. This one is more difficult. We found rotating the panel back and forth, while applying pressure with the trim tool got it out without breaking the clip.
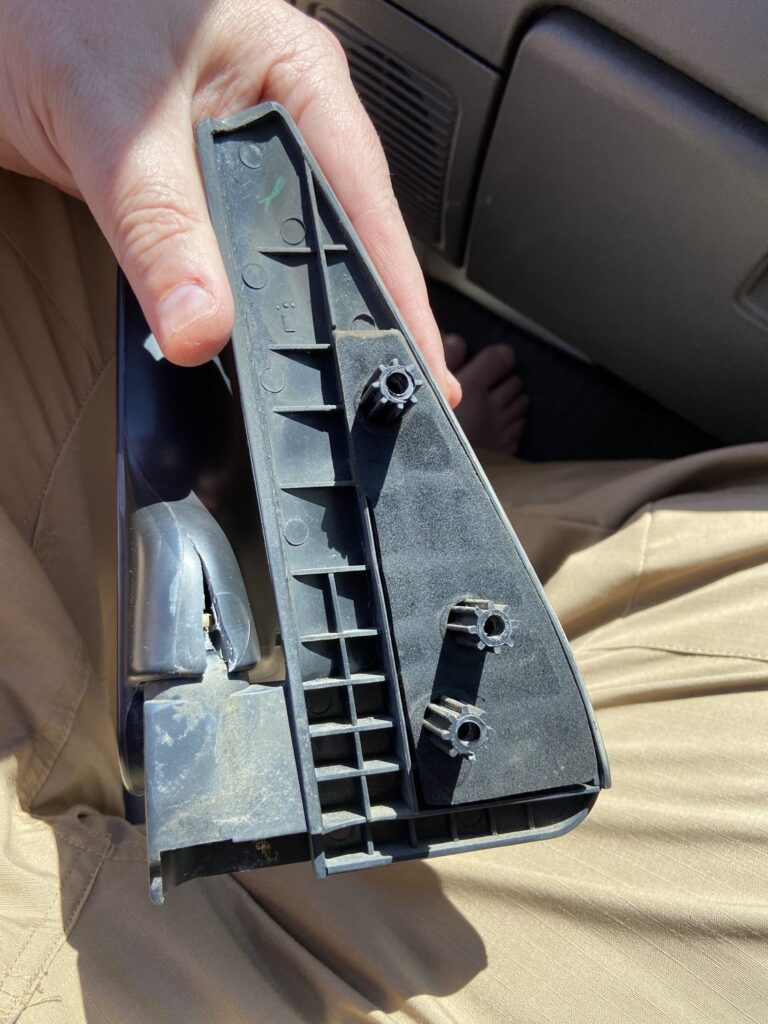
Here is what the back of the panel looks like:

Note how it clips all the way around. Be gentle but firm as you remove it. You really don’t want to break it.
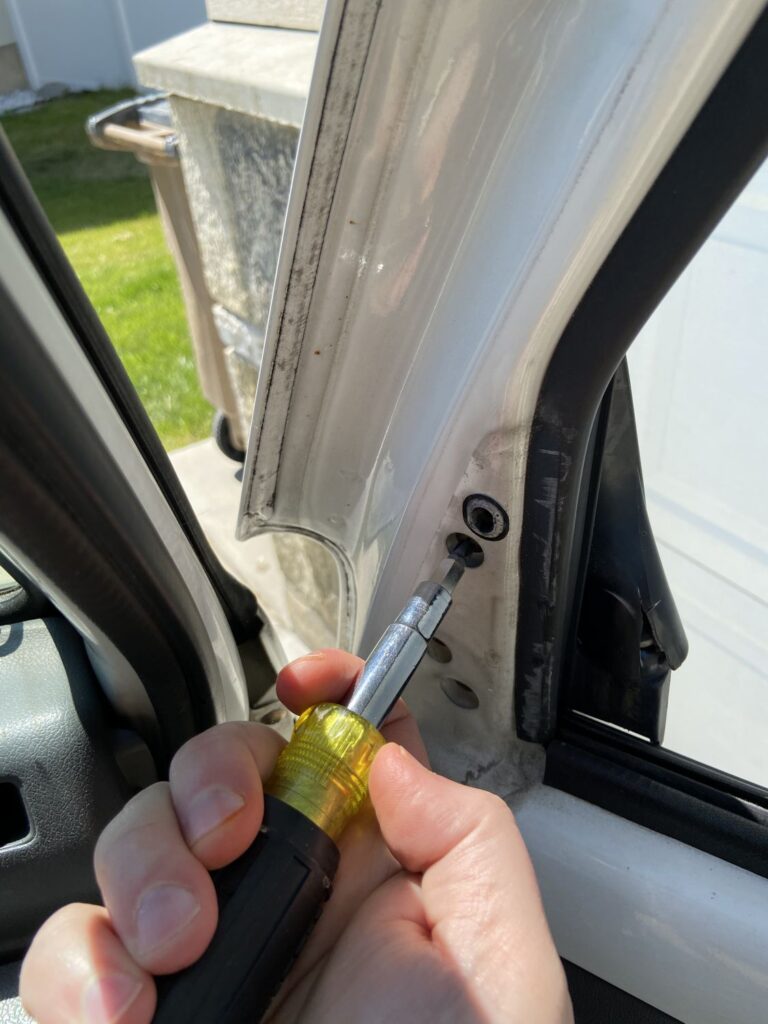
We broke the screws all loose, then unscrewed them starting at the bottom. Support the weight of the mirror as you unscrew the top one so it doesn’t fall on the ground.
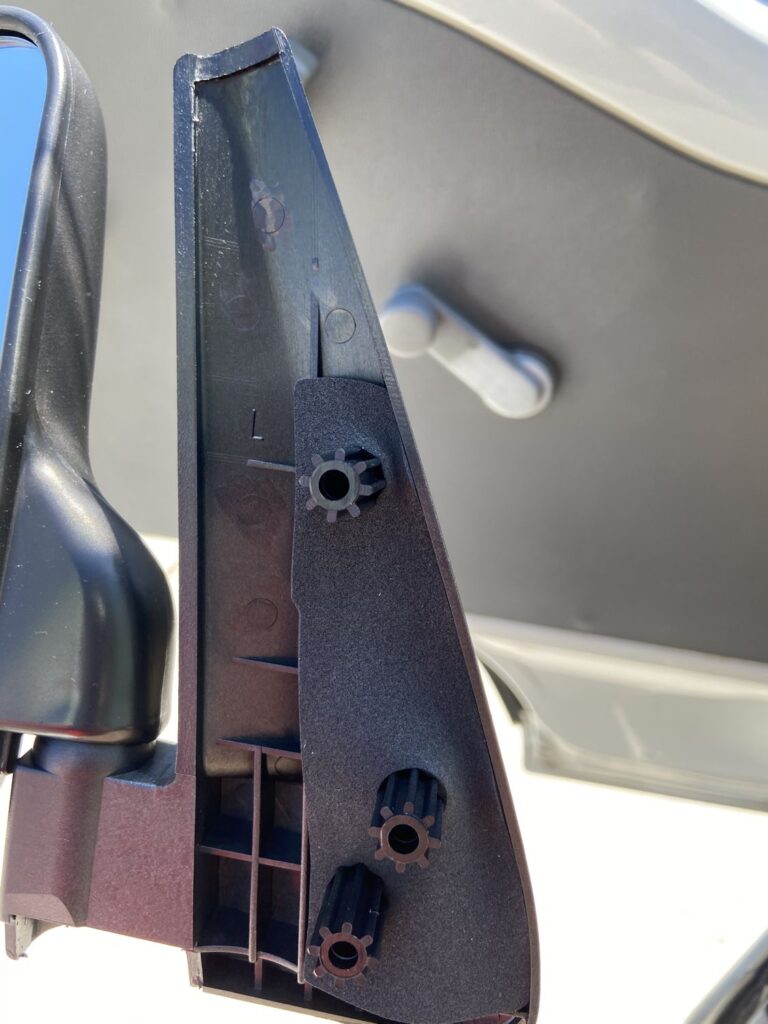
This is where we came across the only thing that was sub-optimal in the aftermarket mirror. Note in the above photo the foam around the screw posts. See how it follows the inside of the line? On the replacement it went just outside the outer edge. You can trim that, or just do what we did:
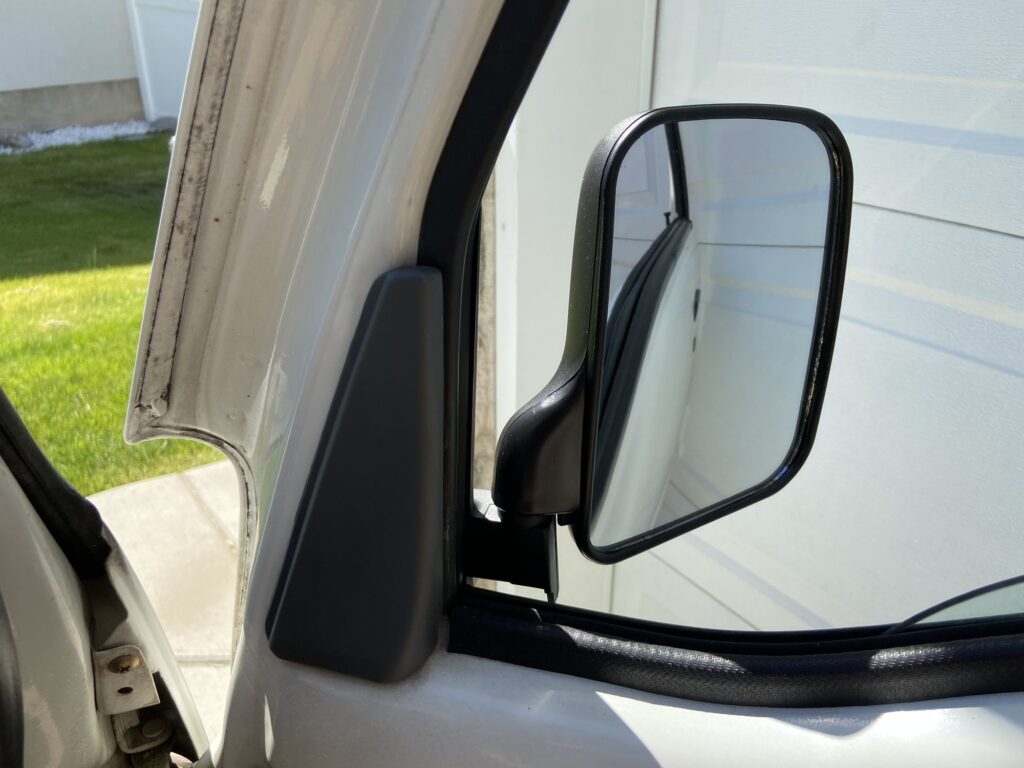
We just tucked it in. It puckered a bit, but there was no issue. We recommend putting all the screws in without snugging them down, and then tightening them while pushing forward on the mirror. It doesn’t do much, but it does shift it a little bit. Replace the panel, and it you end up looking sharp!
The damage was much worse than we thought on the original mirrors. Here is what it looked like:

This is a repair that anyone can do, and it should take less than 10-15 minutes for each side. Really. You will spend as much time cleaning the door as the rest the process. It also spruces up the outside with fresh, clean plastics.
Good luck!


Comments
GOLF CART MIRRORS ARE ALMOST THE SAME AND VERY INEXPENSIVE. DOES REQUIRE THE ADDITION OF SEVERAL NEW SCREW HOLES TO FIT … HOWEVER THE OLD INSIDE TRIM COVERS THEM UP AND THE NEW OUTSIDE MIRROR TRIM ALSO COVERS ALL HOLES. LOOK THE SAME AND A PAIR. ( L&R) COST AROUND $20. FIND ON EABY OR AMAZON.
Author
I agree that is an option. I actually happen to have some in my parts bin. I am trying to keep a stock look… for the most part. Call it OEM+. I also I am trying to keep any changes reversible, and that wouldn’t really be an option going that way. Thanks for the comment though!