
Replacing the old bushings at the end of the cables in our Sambar helped with shifting a lot, but it is still pretty sloppy. Hoping it would make a difference, we ordered the two additional bushings for lower in the shifter. These had to come from Japan.
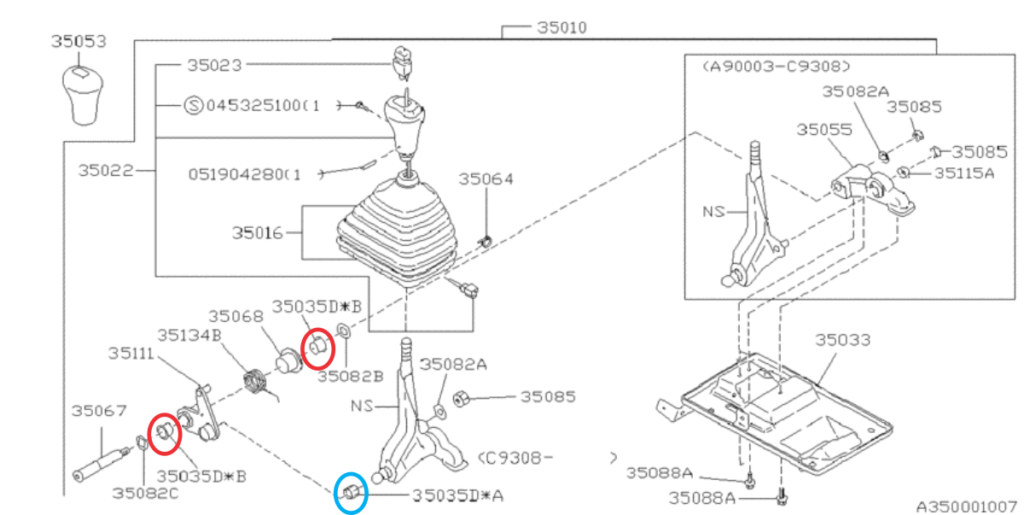
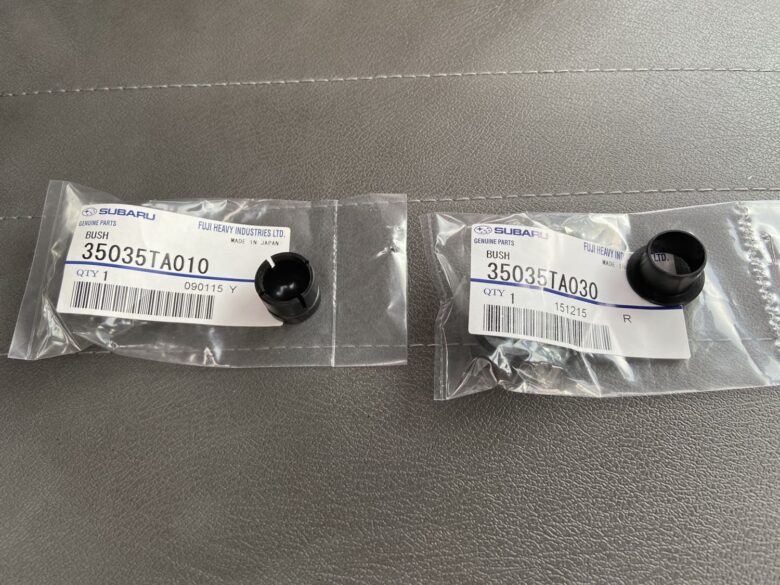
So here is the diagram of the shifter system on the 06/1995-08/1996 4WD gear shift. The parts circled in red are part number 35035TA030 of which you will need 2. One for either side of the linkage. The one circled in blue is actually almost more of a cap for the ball joint. It is part number 35035TA010. These are only available from Japan, so expect to pay dearly for shipping, and you will have to wait for a bit. Yeah, the shipping will be several times the price of these little babies. 35026TA000 is the larger bushing that goes under the spring, but I did not replace that in my linkage.
When they come, you will be the proud owner of the following:

You will need some simple tools.
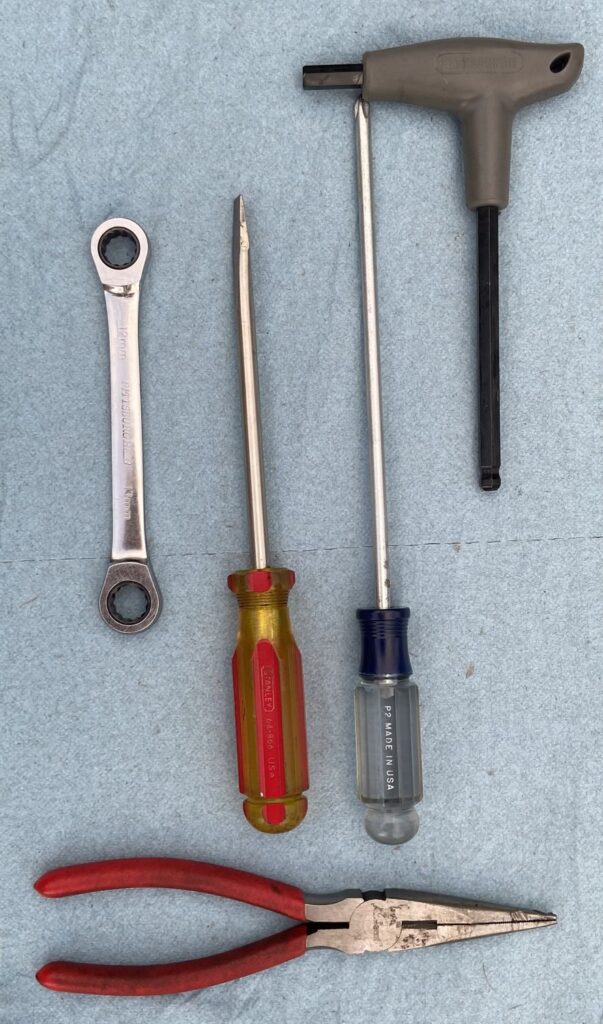
You will need an 8mm Hex driver, a 12mm wrench (ratcheting is nice, but not necessary), a long heavy flat head screwdriver, a long phillips screwdriver, and a pair of needle nosed pliers. Some grease is also good to have. And LOTS of paper towels. While one person can do this pretty easily, having another set of hands at times is pretty helpful. YMMV.
I will have you jump to here to get the first part of getting into the mechanism and getting the cables off.
Once the cable ends are off, you will look something like this:
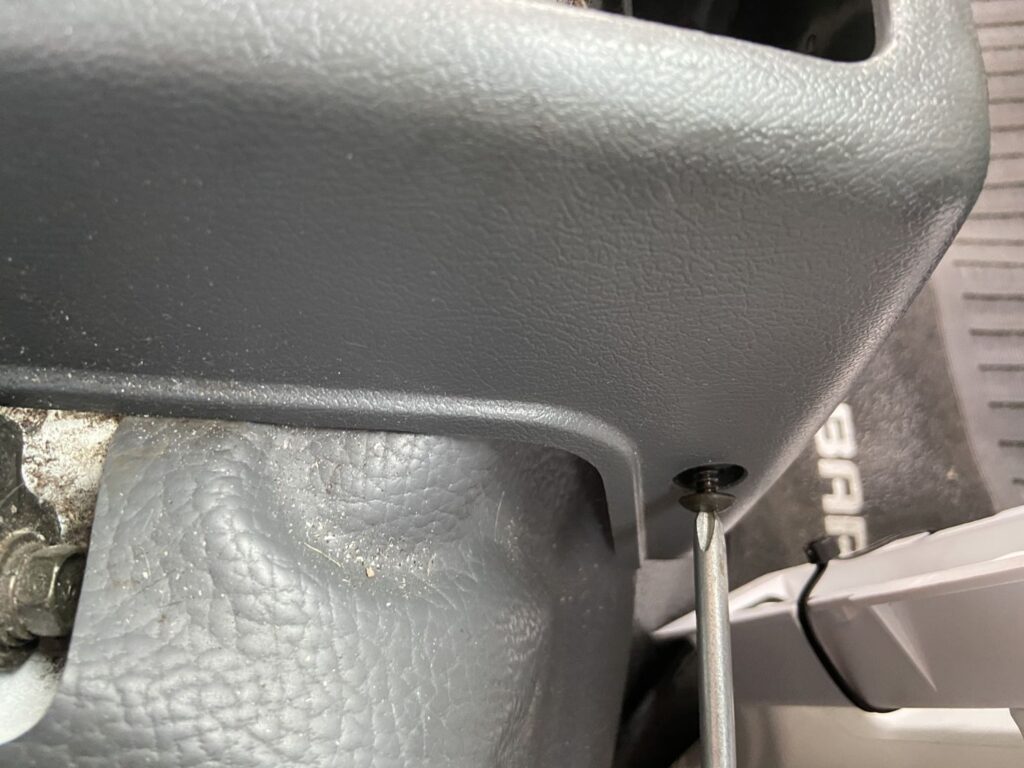
The next step is to loosen the center console. You aren’t going to remove it, but you need some room to work. Remove the screws from both sides:
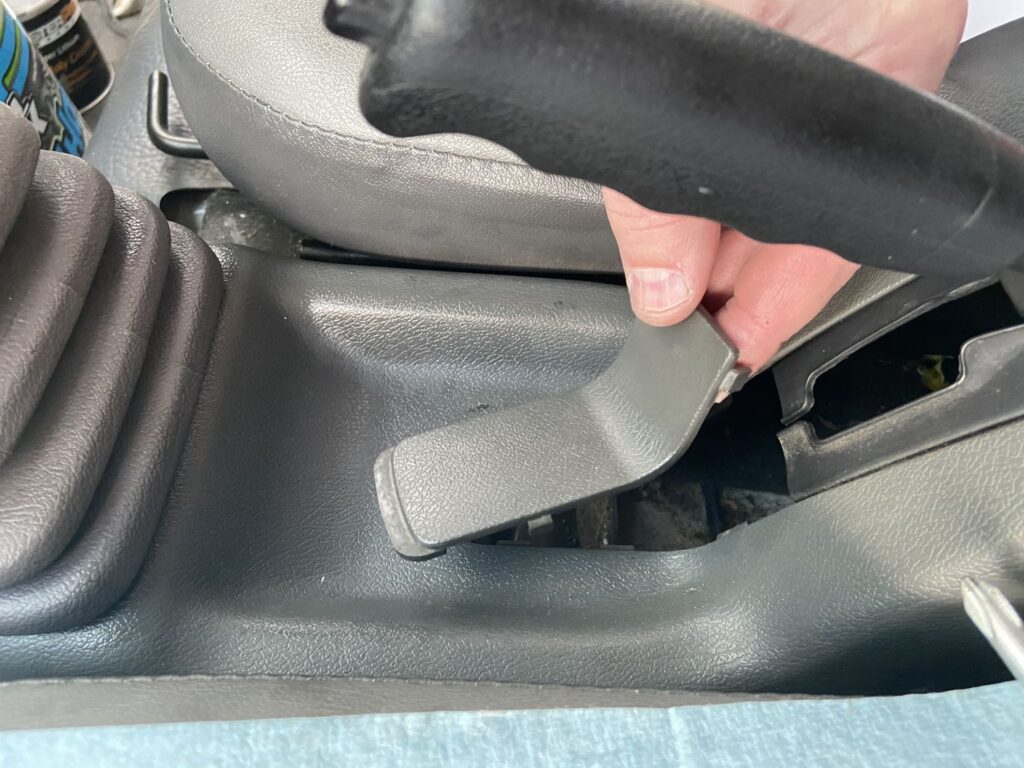
You will also want to remove the little plug below the handbrake.
You should now be able to lift the shifter end of the console just enough to do what is needed. Getting the two screws out in back just aren’t worth the time, as they are deep between the seats and the console. It sounds easy, but really, it just isn’t worth the trouble.
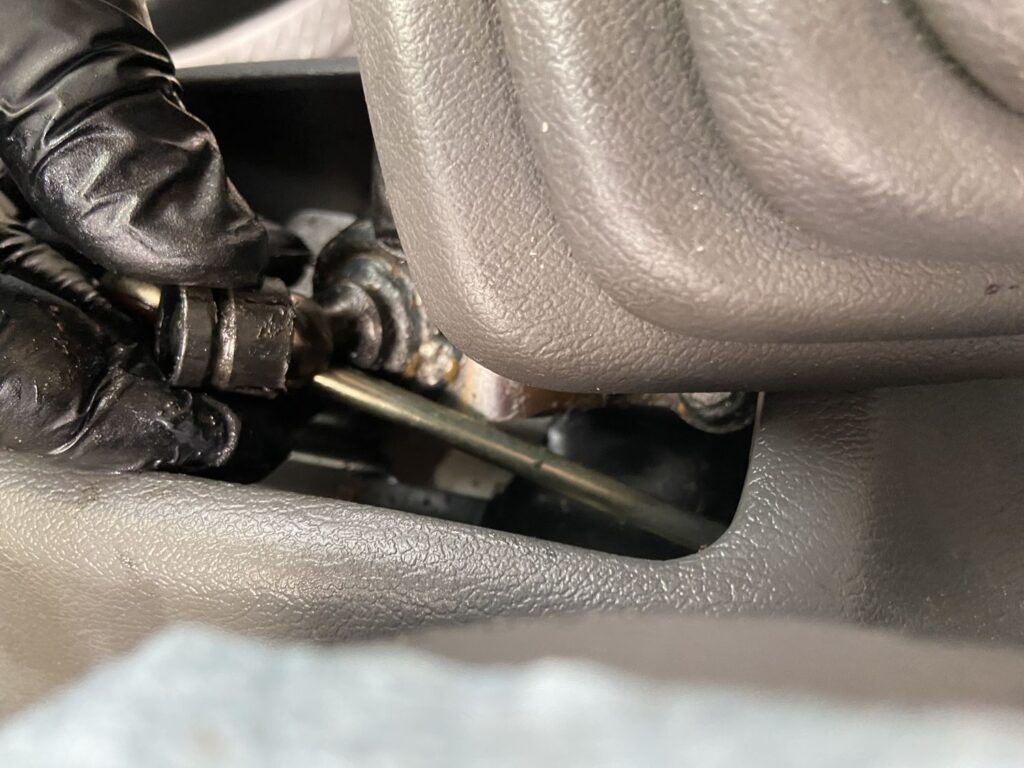
Lift the console and you will be presented with a bundle of wires clipped to the frame. We need to unsnap one clip on this, and just lift it an inch or so.
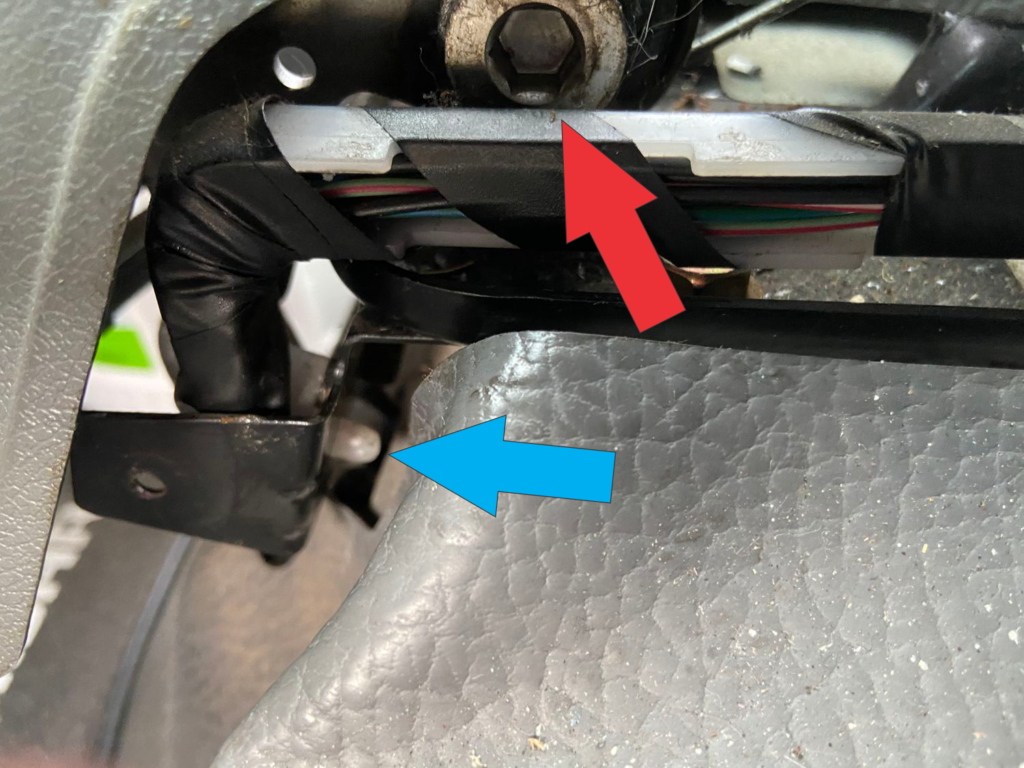
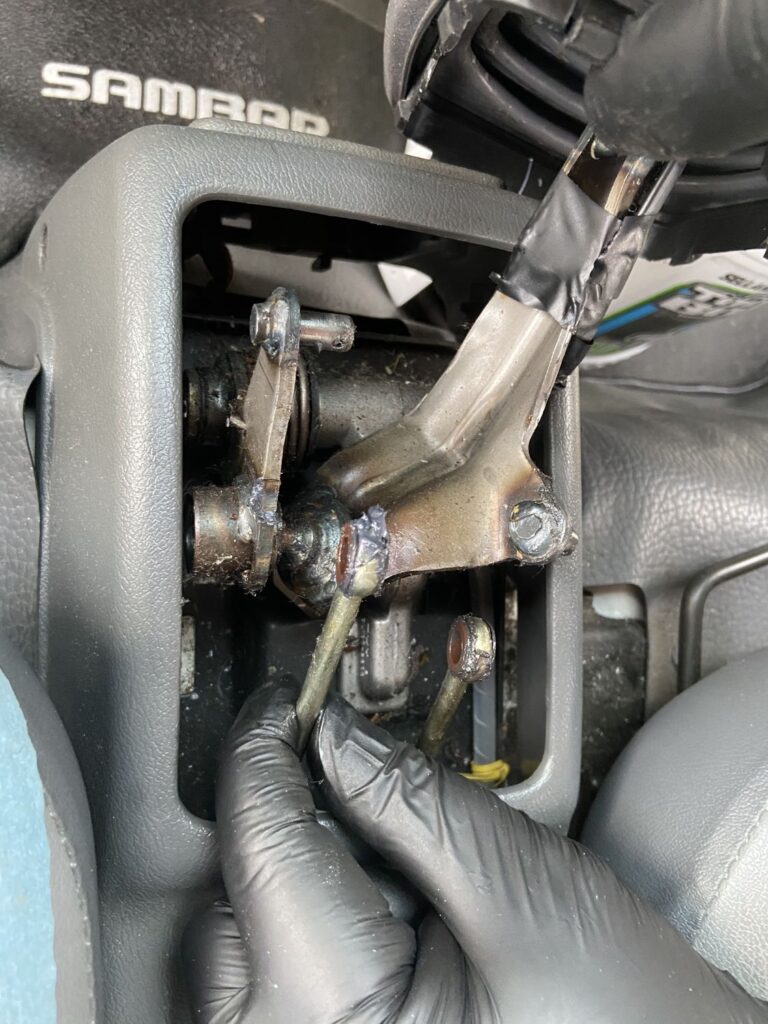
The red arrow points to the bolt we need access to, but the wires and console facade are in the way of. The blue arrow is pointing to the clip that needs to be released. If you use the needle nosed pliers, you should be able to squeeze the white clip and pop it through the hole. This is one of those “V” shaped clips that open up once you push them through. Ours went quite easily.
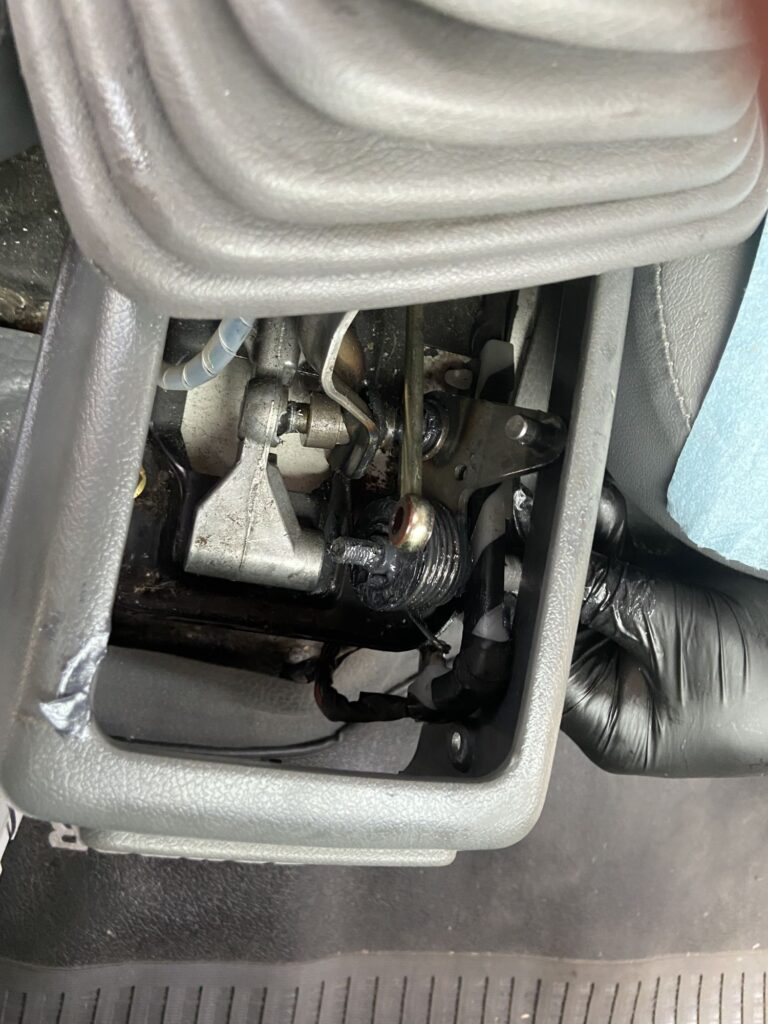
Once you have popped that little white clip, the wire bundle should lift, allowing you access to the hex bolt.
Use the 12mm wrench on the other side and undo the nut.
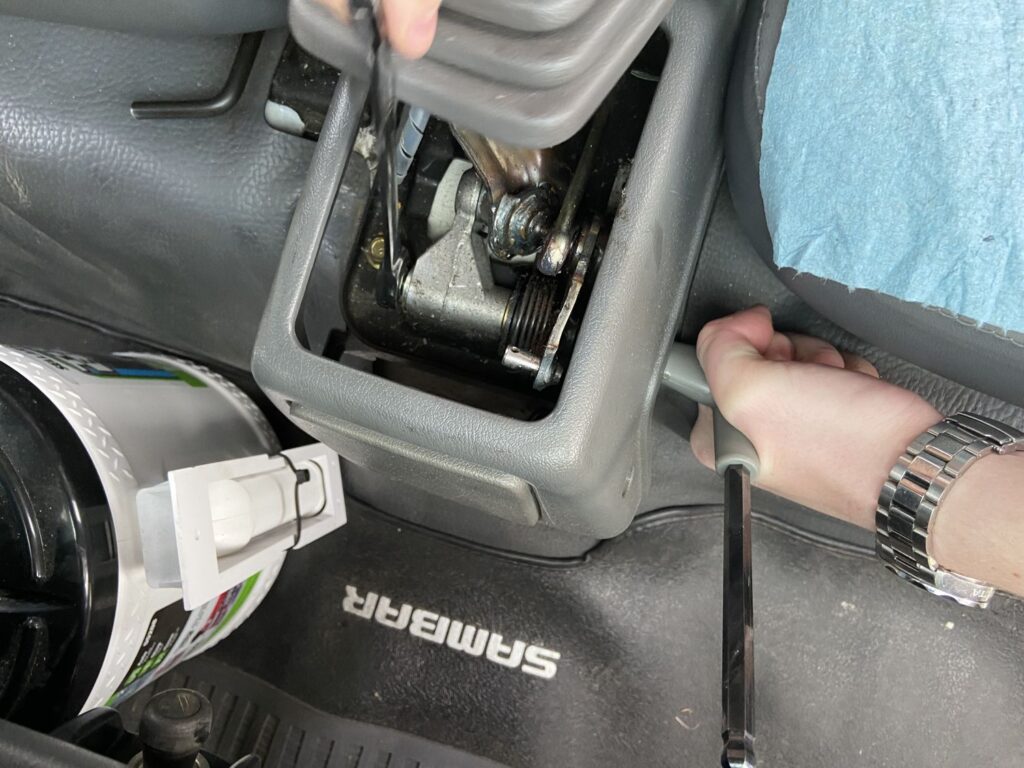
When you remove the bolt, be careful to not drop any of the washers or other bits. Then you might be forced to remove the whole console. Pay attention to the order, but if you forget, you can refer to the diagram above.
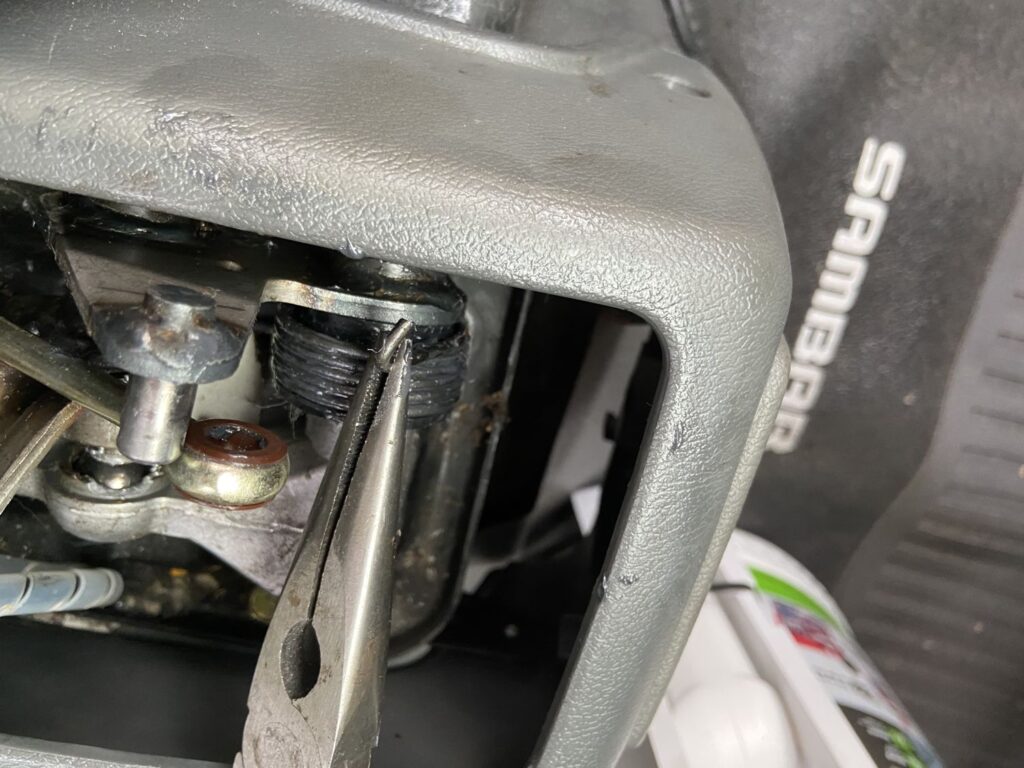
After pulling it apart, the bushings go in either side of the shifter pivot. In reassembling the only two things to pay attention to are that the flange on the large plastic bushing that goes on the outside under the spring (we aren’t replacing that one) goes to the outside. The other thing to note is that the protrusions on the spring should go towards the bottom so that the hook goes in towards the middle. It will hook in the hole on the pivot in a little bit. I recommend greasing the spring and everything else really well.
Prior to assembling that back in, pull the bushing off the ball joint on the shifter arm and snap the new one on. Grease it liberally.
When reassembling, you can put the spring and bushings on the pivot with the bolt halfway in. Before you can put the bolt on, you will need to seat the ball joint bushing in the other cavity on the pivot. Then feed the bolt the rest of the way into the upright. You may find it easier to put the washers and other items on the bolt after the pivot is mounted back on the ball joint.
Push it through and bolt it up.

Using your German torque wrench, tighten the nut and bolt back to Gudentite. You will then use the needle nose pliers to clip the spring into the hole on the pivot.
From there, reassemble the shifter cable ends, and put everything back where it goes.
While this is doable by anyone that is reasonably handy, there are some people who may find it more than they want to mess with. It is NOT hard, but it is a lot of puzzle pieces, and a lot of grease. If in doubt, take lots of pictures as you go along.
If you use this, let us know. It is always fun to hear from people who have walked the road.
Good luck!


Comments
It says all these bushings are discontinued. I’ve searched but can’t seem to find any. Dang!
Author
You need to look on one of the sites that you can buy Japanese OEM parts from. It looks like Amiyama is saying they are out of production. Try JP-CarParts.com. They may be able to get them. Keep trying the usual sources. Someone will have them.