When we ordered our Sambar, the only real option that we looked closely at was the Air Conditioning. Once we found Tyny with the canopy, we were sold despite not having air con. There are other optional add-ons that were available for the Sambar that we weren’t aware of at the time.
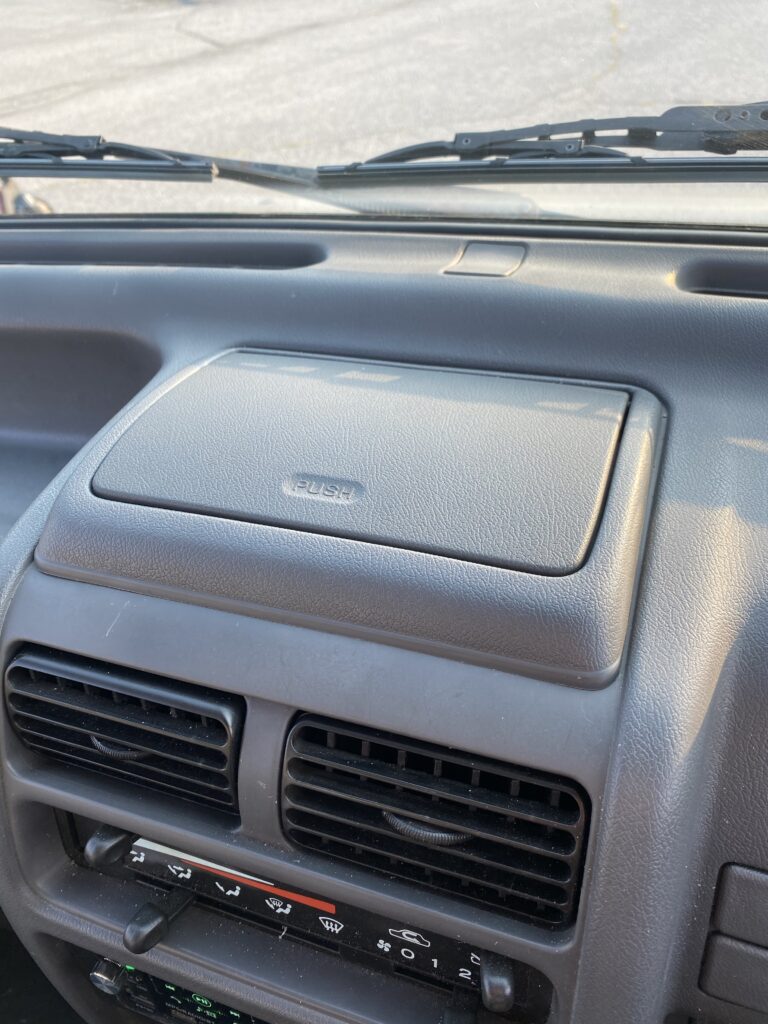
One thing you will note about all the major Kei Trucks from the nineties is that they are bereft of storage. Sure there is a moderately sized glove box, and there are a couple of “trays” on the dash to hold odds and ends, but there really isn’t much room for anything. As an American, one of the most glaring omissions is the complete lack of any cup holders. None. Nada. Zilch.
We ended up CADding up a cup holder to fit the small change dish at the rear of the center console, but it has its own issues.
When we discovered that there was a factory option for a really nifty cup holder that fits nicely in the center console tray, the hunt was on.

There are three pieces listed as needed for the OEM cup holder. The core item is part code 66256C, part number 66390TA000 – BASE COMPLETE-CUP HOLDER. To affix it there are two screws (045104123) and two spring nuts (N510011 / 902510011). We tried purchasing the cup holder new from multiple vendors, but as expected there were none to be had.
The only option is to buy them used. With that in mind, we began to haunt the Japanese Yahoo! Auction site. The one issue that we found is that searching for “sambar cup holder” just didn’t return anything useful. In the end after much digging, one of the phrases that seemed to bring some success was “SUBARU サンバー KV ドリンクホルダー”. We found that it had to be searched for in Kanji to work.
After losing several at a little over 10,000 Yen (around $95), one came up at 11,000 Yen Buy It Now, and we just bit the bullet and got it. After shipping and all in, it was around $150 landed. Insane, yes. But worth every penny.
Here is what came:
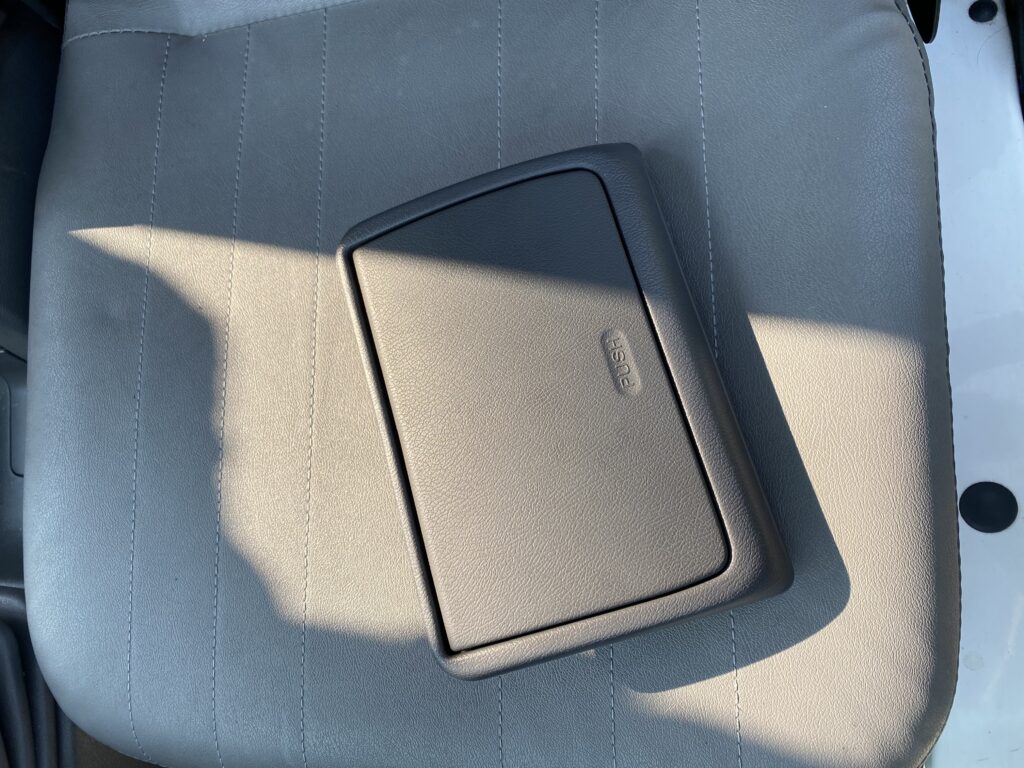

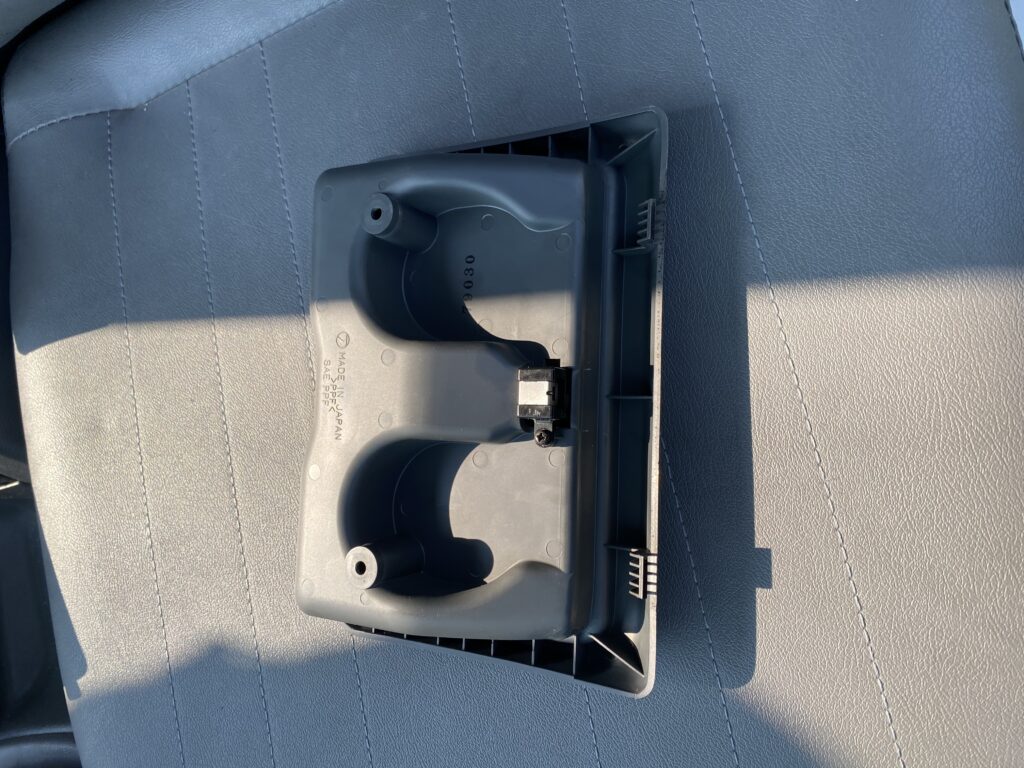
This one is in great shape. All the springs are in good shape, as are all the plastics. The exposed surface had a faint rub line that was able to be buffed out, and the push/click open works flawlessly.
It didn’t come with the screws or spring nuts. We ordered them from the local US dealer for about $5 all in, but ended up not using them in the final install.
The cup holder looks like it will just fit right in the center tray. Yeah, it does….not. So it generally is precisely the dimensions for the space in the dash, but there are some protrusions.
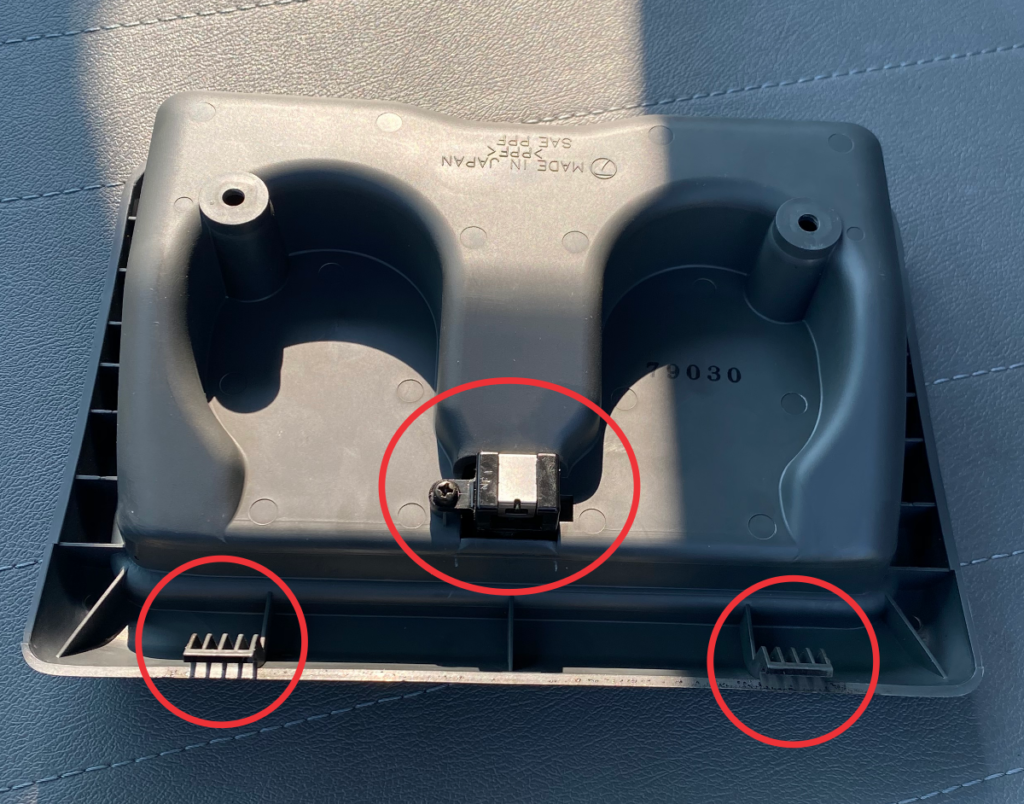
The two front clips need slits cut in the dash tray to fit, and there needs to be a space cut out for the “click” mechanism.
Yes. To install this cup holder, you need to cut your dash. This is not a part that can be popped out and replaced. Mess this up, and it means sourcing a whole new dash from Japan. Proceed with that knowledge.
We used a Dremel with a cutting disk, and a drill to make the holes. The first thing we did was put some masking tape down to mark where the clips should end up. Placing the cup holder in the space, we marked the clip locations, ignoring the push button mechanism for the moment.
A caution here. Measure twice, cut once. If you make a mistake, better to have the clips be too far back. You can always cover if the holes are back to far, if they are too far forward, you are kind of in trouble. It is also easier to file the holes towards the front.
We then drilled out the sides of the slit holes with a drill bit and cut out the centers with the Dremel disk.
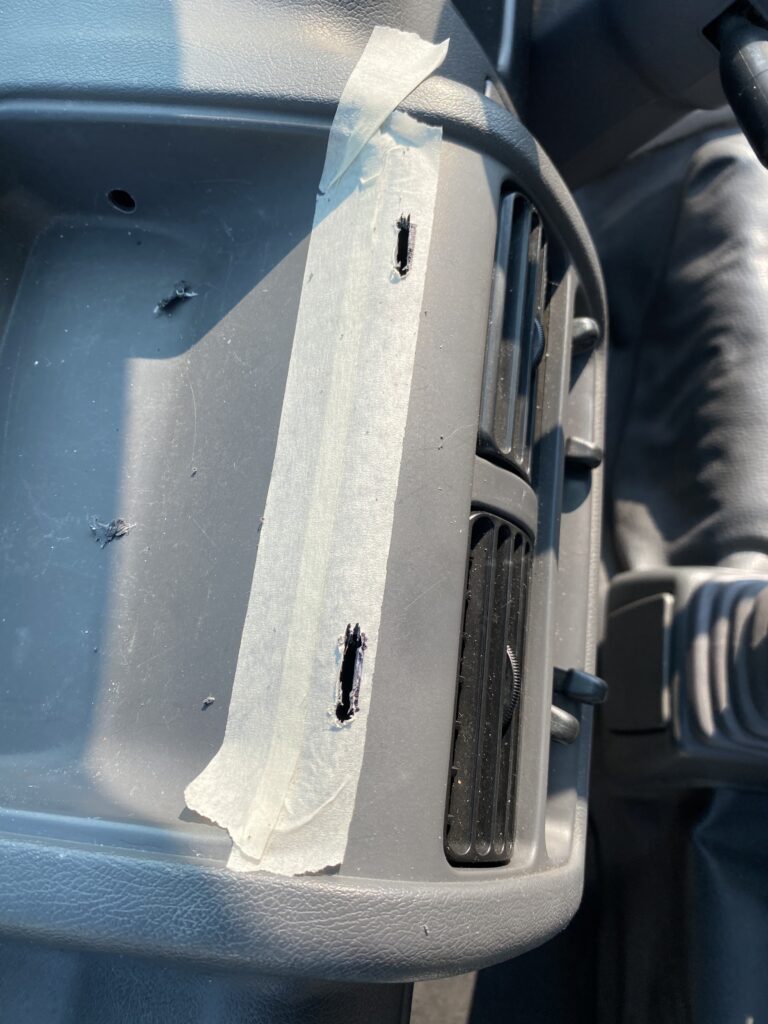
These ended up being not quite deep enough, but they were good enough to begin the process.
To get where the mechanism needs to be, we took some liquid paper (yeah, we still have that), and painted the front corners. A paint pen would work well for this too. While it was still wet we set it in place and transferred the white to the inside of the tray. We then used the Dremel disk to cut out the space for the click mechanism, and widened the front slits.
It isn’t pretty (it is actually pretty ugly), but it worked beautifully.

Ignore the hole at the top of the photo. We had a wireless phone charger in there before, and that was for power.
Using two self tapping screws, we then installed the cup holder. We put it in place, and just drove the screws in through the holes provided in the cup holder.
The look is great!
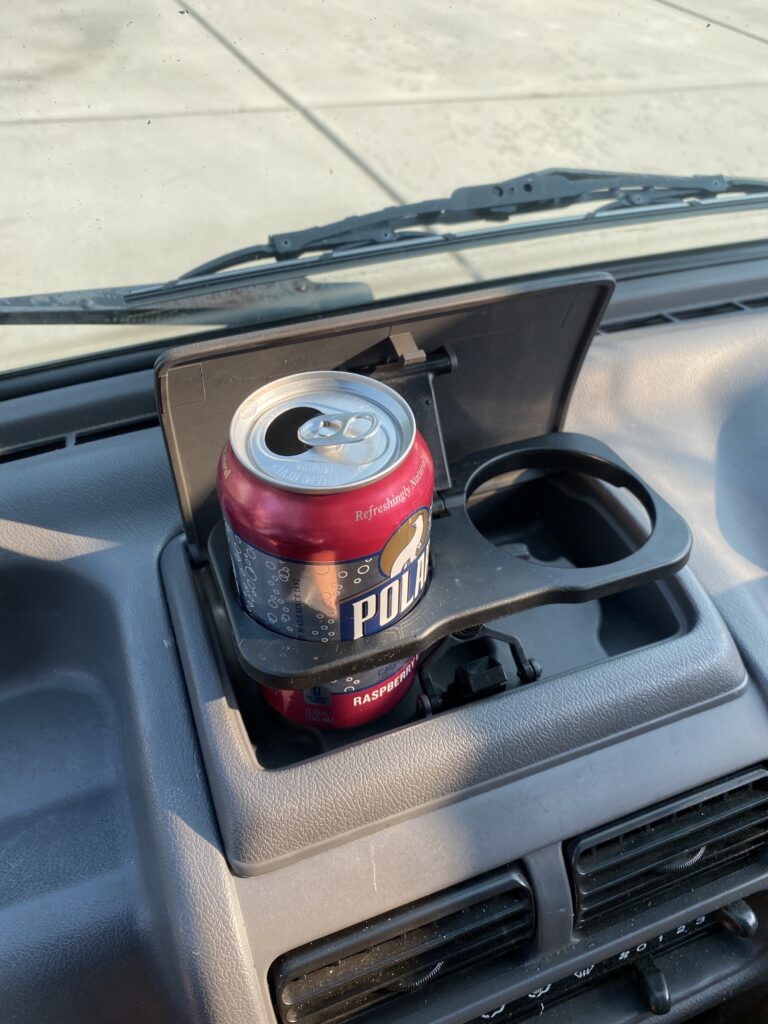
It looks fantastic in place. Seriously, it really looks nice, and it functions beautifully.
One other caveat to note before going down this rabbit hole is that the holders are really pop/soda/coke can sized. Water bottles, small cups, things like that should fit. You will not fit a Big Gulp in there. Even if the diameter is right, if the cup tapers too much, it will not fit as it will hit the lid. You have been warned.
But even with that caveat, we are thrilled with the results, and look forward to many held drinks in the future.
Let us know if you do this too!