As we are going through and servicing Tyny, we are finding that there are a lot of things that aren’t documented well that are specific to the Sambar. For instance, there are a TON of YouTube videos on servicing drum brakes. any of these will get you most of the way there. There is one catch though… nobody bothers to tell you how to get the dang drum off so you can check it or service it.
Hopefully this will save you some confusion.
Tyny is a 1996 KS4. It is quite possible that some of the specifics I list may not apply to your truck if it is a different year. Even so, the general idea should hold true.
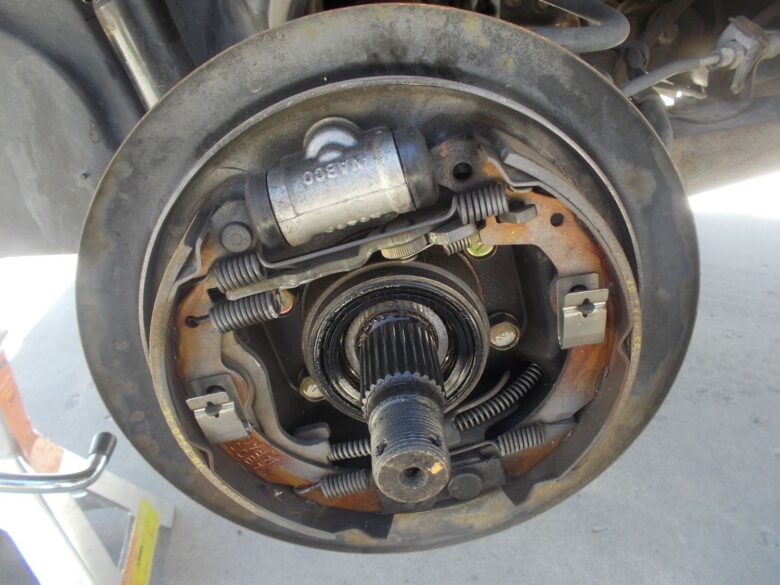
Once you have it up on jack stands (and I would recommend having it on four of them, or at least chocking the front tires both front and back), remove the wheel, and you will be presented with the following:
Removing the drum isn’t immediately obvious, and it looks like there is more going on here than there is.
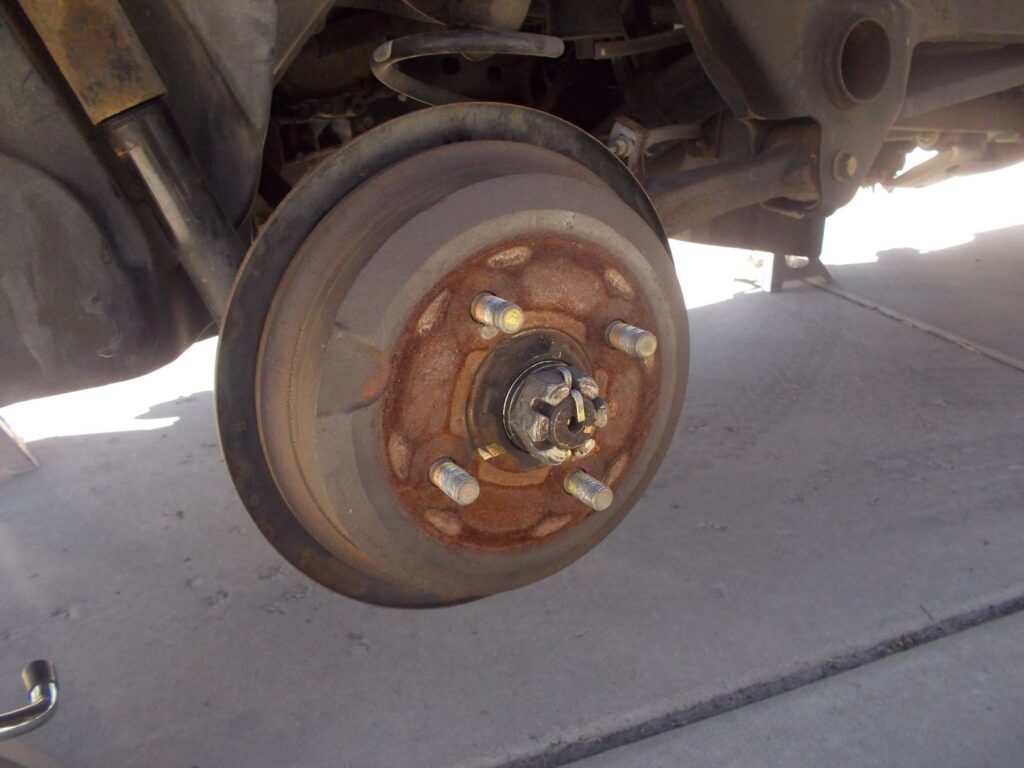
The first thing to do is remove the cotter pin on the large central bolt. This will take a bit of effort, as the pin is quite thick, but you want it to be straight up and down as much as possible. You can then use a mallet of some sort to tap it down until it protrudes from the bottom. Use a pair of needle nose pliers to grab the loop, and we just hit the pliers with the mallet to get it out the rest of the way.
You can now remove the large nut. Ours is a 36mm nut. We were fortunate to have a 36mm wrench but it was tight enough we had to use a rubber mallet on the handle of the wrench to get the bolt to budge. Don’t hit the end of the wrench handle. Breaking the handle isn’t out of the question. When the nut came off, there was a washer that was easily removed, and it looked like this:
The ring in the center is tapered, and quite securely on there. We found that gently twisting a flat head screwdriver in the gap allowed us to slowly get the ring to work its way off the spindle, and finally come off.
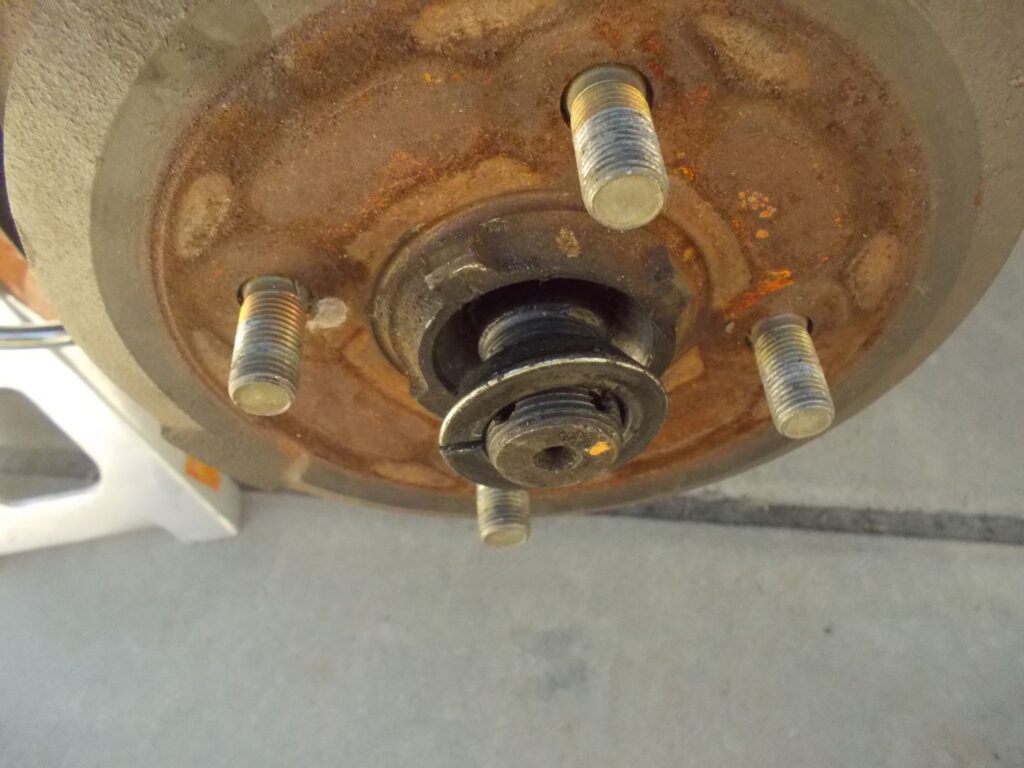
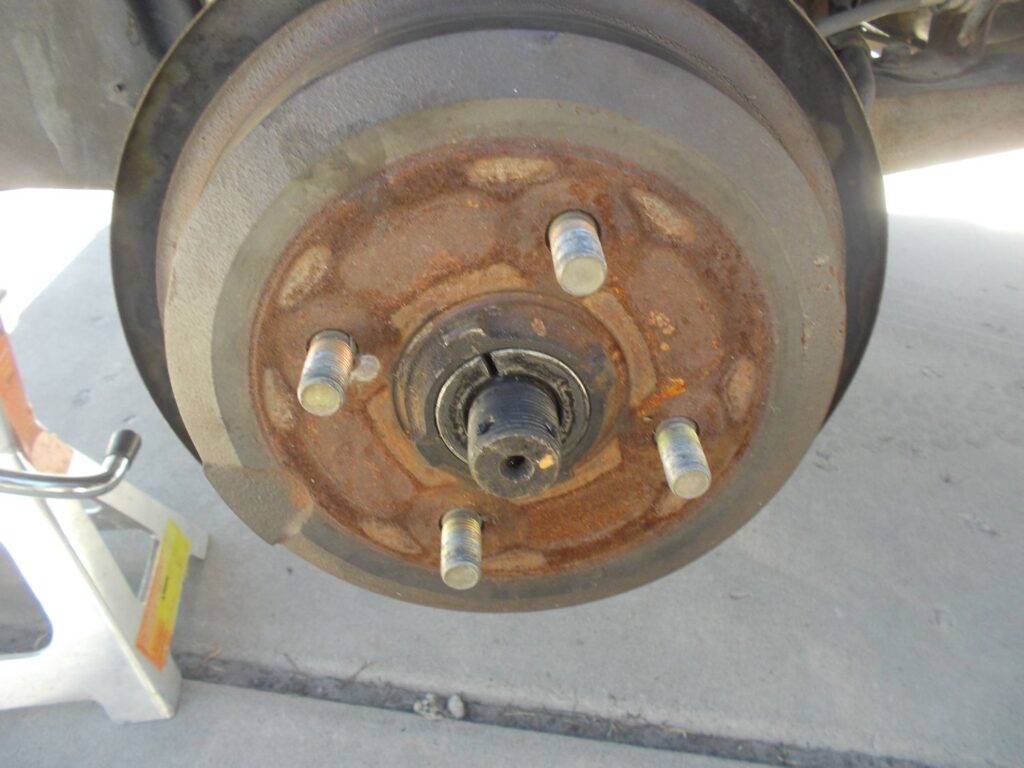
Once that is off, make sure the parking break is disengaged, and it shouldn’t take much effort to get the drum off.

From there, it should pretty much follow the generic YouTube tutorials for drum brake repairs.
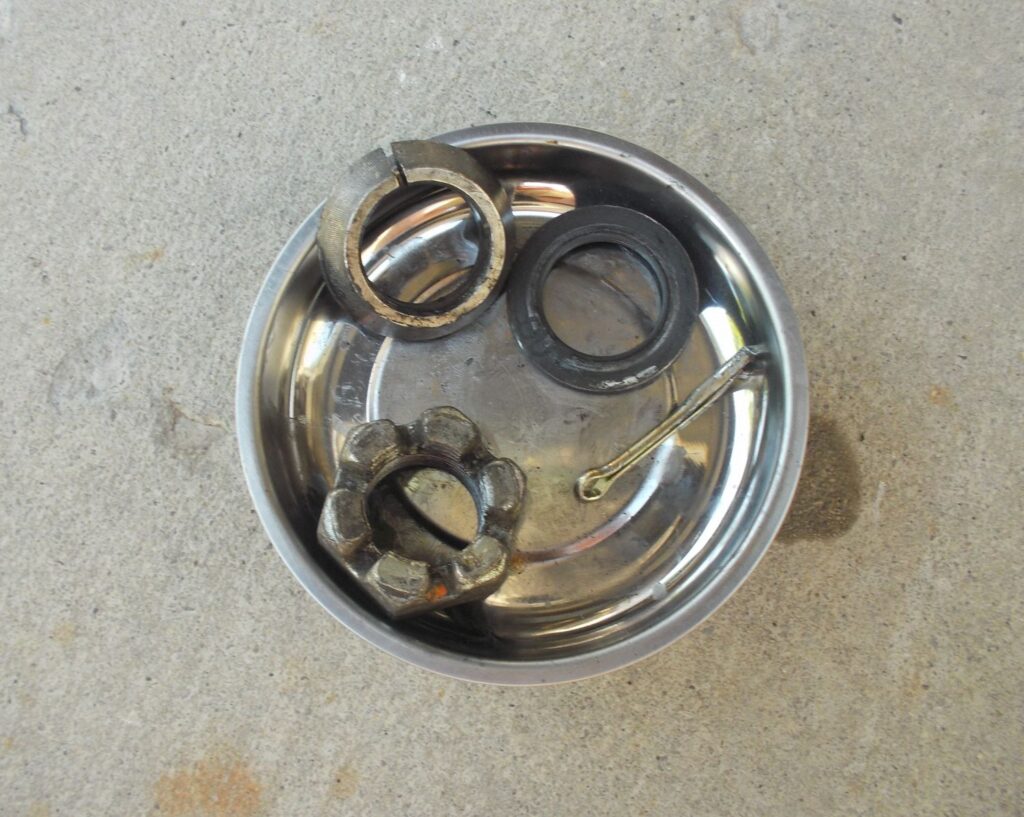
Here are the parts as removed from the drum and spindle to get it off.
If you look at my brakes, they have plenty of life left, so I just buttoned it up without doing anything. One thing I did note on tightening the bolt at the end was it didn’t necessarily align with the cotter pin holes. I am also skeptical that they will line up properly when the bolt is tightened to the recommended 140-150 ft/lbs. Our technique was to tighten the bolt as tight as it would go manually, and then, again using a rubber mallet, hitting the wrench handle towards the middle of the handle to further tighten it. This would turn the nut very slowly, eventually exposing the cotter pin hole. Once the hole was aligned, we put in the cotter pin which prevents the nut from backing off. It isn’t as precision, but it is practical.
Anyway, let us know if this was of help to you!